Alright, buckle up! Adding Dropbox folders to File Explorer is gonna be a breeze once we knock this out. Here’s a step-by-step that you can follow:
-
Download and Install Dropbox: First off, make sure you’ve got the Dropbox desktop app installed on your computer. Grab it from the official Dropbox website.
-
Sign In: Open the Dropbox application and sign in with your credentials.
-
Enable Dropbox in File Explorer:
- Once you’re signed in, Dropbox generally integrates with File Explorer automatically. If it doesn’t, you might have to manually add it.
- Open the Dropbox desktop application, go to ‘Preferences’ via the Dropbox icon in your system tray (bottom-right of your screen).
- Under the ‘Sync’ tab, you can choose which folders you want to sync. Make sure they are checked.
-
Check File Explorer: Open File Explorer and navigate to ‘This PC’ or ‘Computer’ on the left pane. You should see a ‘Dropbox’ entry here. If not:
- Go to the Dropbox icon in the system tray again.
- Right-click on it and select ‘Preferences’.
- Ensure that the ‘Start Dropbox on system startup’ option is checked and your folders are listed under the ‘Selective Sync’ setting.
-
Reboot Your System: Sometimes all it takes is a good old restart to see the changes take effect.
Still no luck? It might be time to call in the heavy artillery. Consider using a comprehensive file manager like the CloudMounter app. It’s a powerhouse for managing multiple cloud storage accounts directly from your desktop, kinda like an Avengers team-up but for your files. Super handy!
Although Dropbox’s native desktop app is pretty solid for the basics. You get file sync, you get your stuff on your PC – done. But if you want something a bit more powerful, CloudMounter is where things get interesting. Instead of chewing up space on your hard drive with local syncs, this app lets you mount Dropbox as a network drive. That means you can access everything directly, right from File Explorer, without filling up your disk. And bonus—you’ll usually see better performance because of it.
Got more than one Dropbox account floating around (say, one for work and one for personal)? The native app makes that tricky, but CloudMounter handles it like a champ. You can log in to multiple accounts at the same time and switch between them with no fuss.
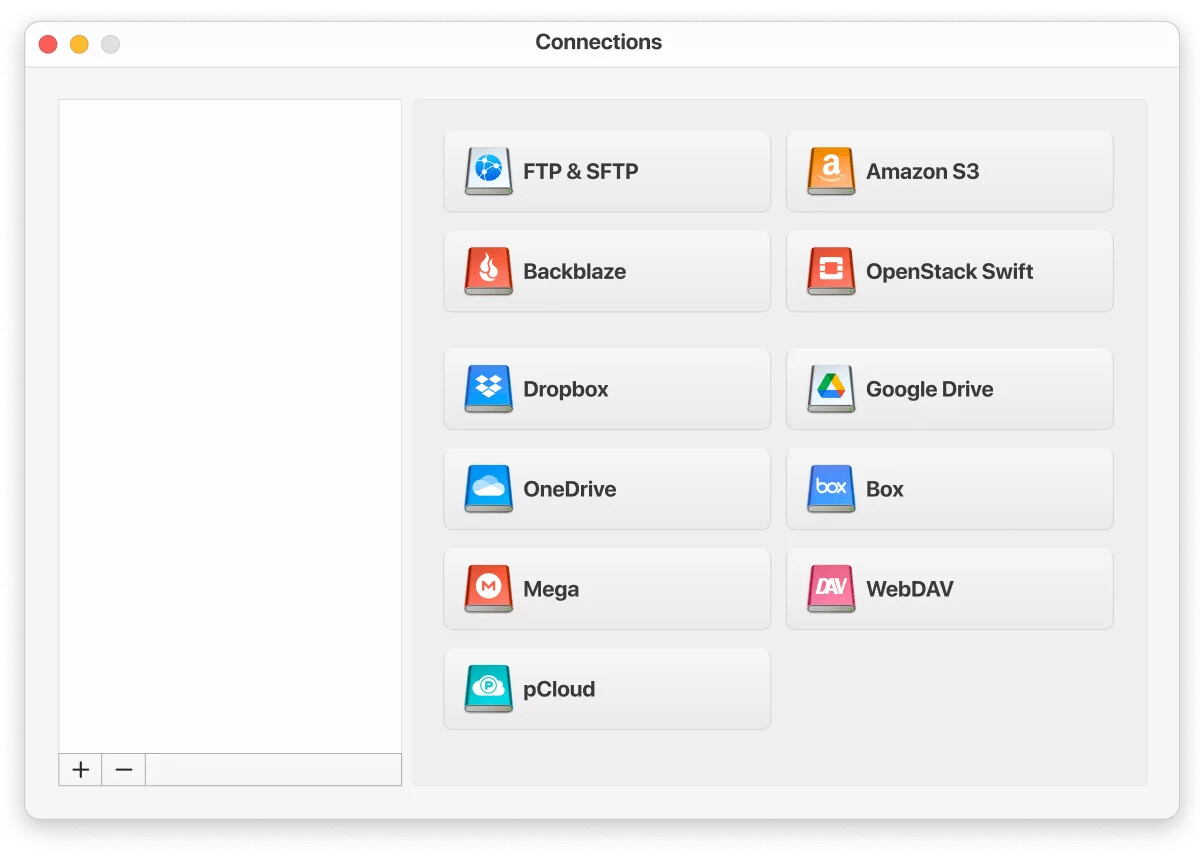
And it doesn’t stop at Dropbox. We’re talking Google Drive, OneDrive, Amazon S3, Box, MEGA, WebDAV, FTP/SFTP—the whole squad—available through one interface. Even better, you can shuffle files between services directly. Moving something from Dropbox to Amazon S3, for example? No middleman apps, no downloading to your PC first. Just drag, drop, done.
How to add Dropbox folders to file explorer via CloudMounter:
-
Install and launch the app.
-
Choose the Dropbox icon from the list and click it.
-
Sign into your Dropbox account.
-
Click the Mount button.
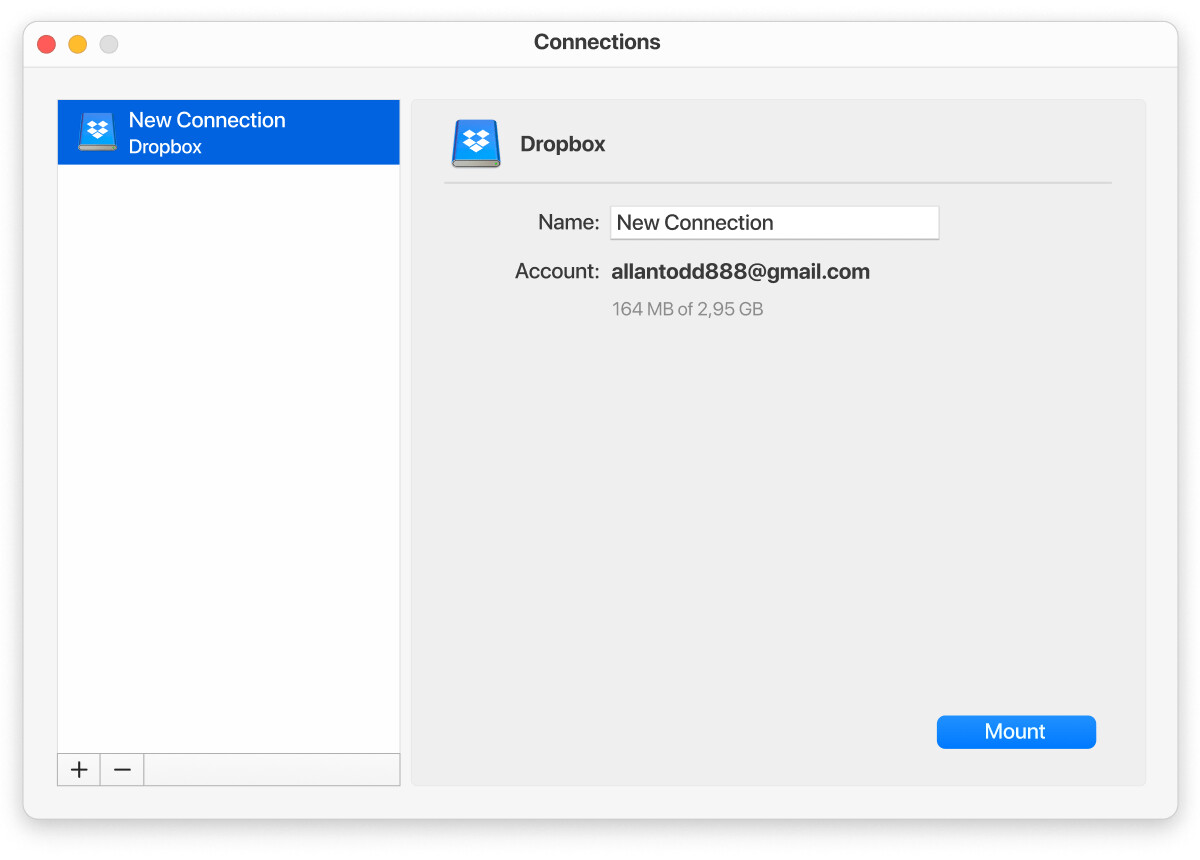
That’s it! Super easy and quick.
So, in a nutshell: CloudMounter isn’t just another sync client—it’s more like a control center for all your cloud storage. If you’re juggling multiple services and accounts, this setup can save you a ton of time (and headaches) right inside File Explorer.
Remember, your star is your patience. Don’t go pounding your keyboard just yet, though we’ve all been there, right? ![]()